Cultivating wild yeast to leaven bread is something I’ve been wanting to try since I learned it was possible. I should have done it much sooner. My bread game is changed.
The process creates a sourdough starter that will last as long as I keep feeding it. Creating the initial starter takes around 14 days before it’s ready to use for baking bread. I started with local hard red wheat berries that I ground into a course flour.

I mixed equal parts of the whole wheat flour with pineapple juice — 60 grams each by weight. I kept it in my proofer set to 70F, and followed the remaining sourdough starter-making videos here.
After a week of tending my starter, it still wasn’t fermenting much. I turned the temp up to 72F. That seemed to jumpstart things a little bit. After a couple more days, though, fermentation activity remained low. I ended up purchasing local freshly-ground whole wheat flour to continue my feedings. Once I did that, fermentation really took off with big bubbles forming in the mix. The wheat berries I had were a few years old, so may not have had enough natural yeast and bacteria to get the process going strongly enough to create a leaven.
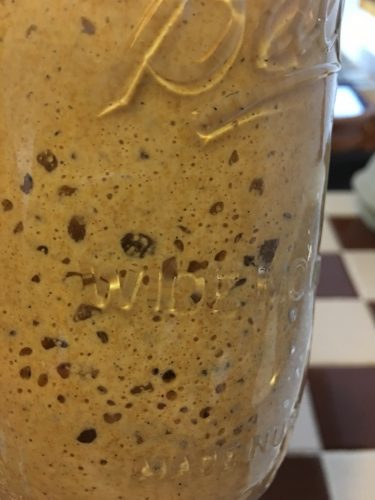
I made my first dough with the starter on Day 15. To test to see if the starter was ready, I fed the starter and marked the level of the mix. The videos say the starter should double within a few hours when it’s ready for baking. Mine more than doubled within the first hour.

From there I took out 100 grams of the starter, 390 grams unbleached white all-purpose flour, 8 grams sea salt, and 250 grams water. I mixed that together, and set it in my proofer at 75F for 4 hours. After 4 hours, I took it out, stretched and folded it a few times, and proofed it at 70F for 2 hours. The dough was very sticky at this stage.
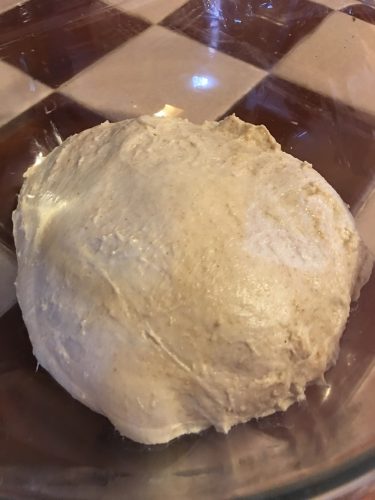
At the 2-hour mark, I stretched the dough from the outside to the center to form a gluten “skin” and let it rest for 20 minutes at 70F. In the meantime, I floured a banneton.

I put the dough in the banneton after 20 minutes, put the whole thing in a plastic bag, and placed it in the refrigerator overnight.
In the morning I put the banneton with dough in the proofer at 76F for 4 hours until a finger poked in the dough had just the right resistance — not too “slack” and not too tight. Seeing the video helps.
Once the loaf was getting close to finished proofing, I placed my baking cloche in the oven and preheated to 500F.
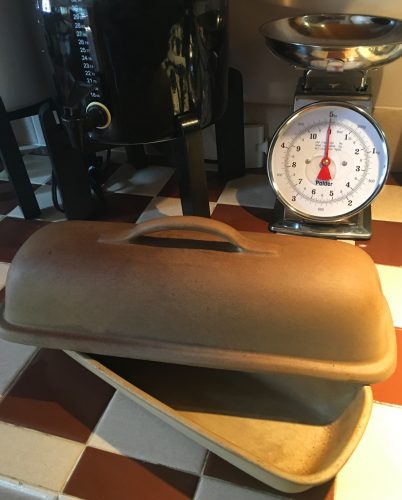
When the oven was ready, I took out the bottom cloche half and lined it with parchment paper.
The next step was to flip the dough into the preheated cloche. Unfortunately, the dough stuck to the banneton so I had to rip the bottom layer of the unbaked loaf to get it out. Not ideal both for tearing the dough and for deflating it a bit. The top of the loaf looked a bit funky, too.
I reduced the temperature to 450F, sprayed the top of the dough with water, put the top on the cloche, and baked the whole thing for 15 minutes. I removed the top at that point, and finished baking for another 15 minutes.
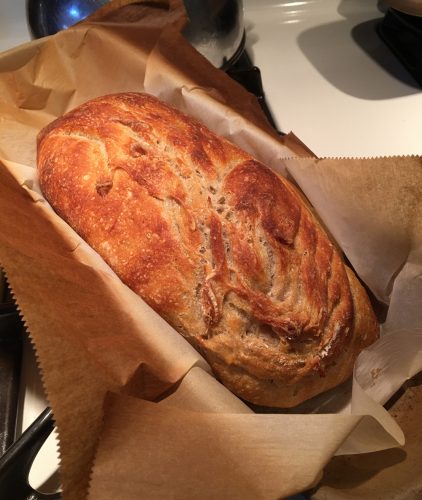
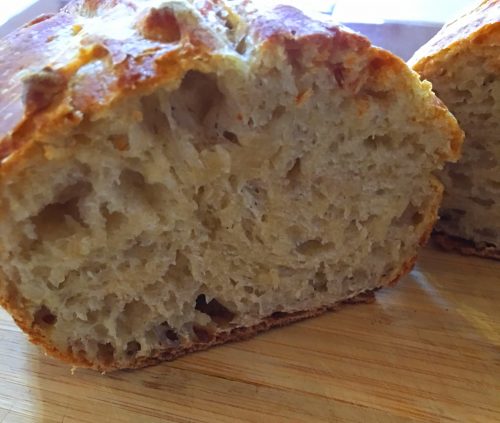
The resulting bread was deflated on one side, but the crust had a beautiful crunch, the crumb was springy, and the taste was a tiny bit sour and delicious.
Next time I’ll make sure the banneton is sufficiently floured before putting in the dough to proof. I’m looking forward to seeing how the starter changes over the next week as I keep feeding it, and if the bread is any more sour.